
VPN_Sync_Mac can retrieve your OpenVPN keys as well as generate your complete list of Shadowsocks (SS) configuration files automatically. After you have logged onto VPN_Sync_Mac with your username and password, the program will show you which OpenVPN servers you have installed in the center box.
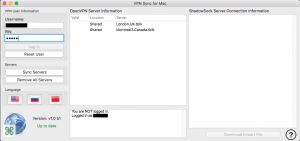
After you click on the “Sync Servers” button, the program will compare the list of servers on your machine versus the official list of servers available.
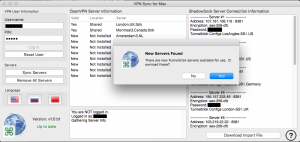
If there are new OpenVPN servers available that you do not have installed, the program will ask you if you want to download the keys for those servers as well. The middle box will display the results of the sync by showing which existing servers are still valid and which ones are new. If you click on the “Yes” button, the program will download the keys to your desktop and place them into a folder that is named in the format of: “<username>-Tunnelblick-keys”.
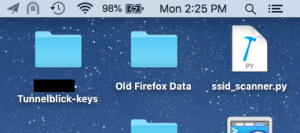
Open that folder up and finder will show you all the key files. Double clicking each one individually will launch Tunnelblick and prompt you for how you want to install the key.
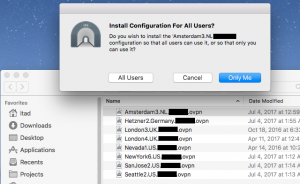
Use the default value of “Only Me”. Tunnelblick will take care of the rest of the configuration details. You may now use Tunnelblick normally.
Open up your ShadowsocksX–NG program. On the right-hand side of VPN_Sync_Mac, if you have SS enabled for your account, it will list all of the available SS servers and their connections.
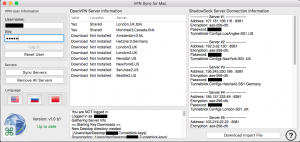
Clicking the “Download Import File” button will create a JSON file on your desktop that you can use to import directly into the ShadowsocksX-NG program. From your menu bar on the top of your Mac, click on the ShadowsocksX-NG paper plane icon to expose the menu. Go down to servers and when the menu expands out, click on the “Import Bunch Json File…”
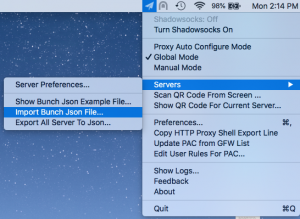
This will open up a Finder window where you need to select the SS generated import file from your Desktop. It will be named in the format: “_ssimport.json”. Open that file up and ShadowsockX-NG will import all of the servers.
Things to make sure:
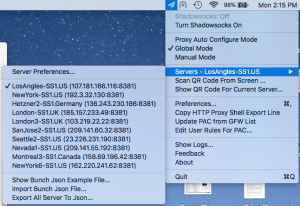
- Make sure that the “Global Mode” is checked.
- Make sure that you have selected a server to connect to. Usually the one that is geographically closest to you will offer up the best performance.
- Click the “Turn Shadowsocks On” button to enable your SS VPN to start.
On the Mac, we have found that both the Safari and Chrome browsers work the best. Firefox requires additional configuration and we do not recommend using it.
For SS VPNs, remember that unlike OpenVPN which encrypts all your internet traffic, SS only encrypts by default the traffic that goes through your web browser. You should use ShadowSocks VPN technology with countries like Iran, China and Russia where they actively try to detect and shut down OpenVPN connections. You should only use ShadowSocks in situations where OpenVPN would not normally work.